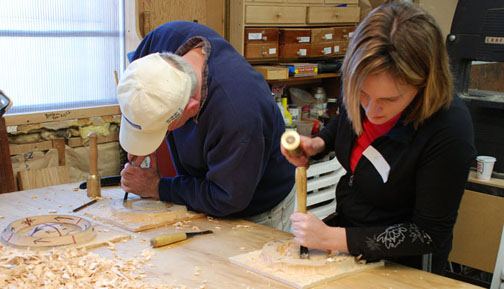
If you are interested in trying your hand at woodcarving, there are several designs available to you. These patterns can be printed, making the entire process much easier. Beginning students can begin with geometric patterns. Once they are proficient at carving, they will be able to move on to more complex patterns such as flowers or animals. We'll be looking at some examples of woodcarving patterns in this article. Listed below are some of the best patterns you can use to learn the art.
Fine Woodworking by Dremel.
If crafting is your passion, the Detailed Engraved Flower (Finewoodworking by Dremel) might appeal to you. These rotary tools (often called Dremels) are great tools for engraving and detail. They are simple to use. You just need to set the speed dial and push a button on the head of your unit. The speed dial determines how much material can be removed when carving wood surfaces.
Frank C. Russell: Detail Engraved Flower
The "Detailed Engraved Flower By Frank C. Russell" has been reproduced both nationally and internationally. Russell's early work was heavily influenced by first-hand observations, even though his output was not completely documentary. His later works, a combination of secondhand information and fictionalization, are not strictly documentary. These works, however, are representations of a part myth and part reality, with no definitive proof that the narrator is correct.
"Detailed Engraved Flower by Frank C, Russell," one of his earliest works, is a vivid example of the artist's skill. This small work, which dates back from 1911, consists of an ivory grip with the head of a bull. The image is only a few mm long. This masterpiece was created by the artist in tribute to his mother who had passed before him.
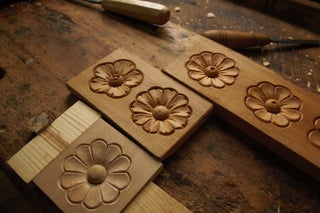
Detailed Engraved Flower by Tumbled Rose
Tumbling rose's detailed engraved flower is a gorgeous wood carving. Although the flower looks simple, it actually has many intricate petals. This flower is a great project for novice carvers because of its intricate details. These stock photos only show part of the engraved floral design. It is possible to find a few that work better than others. Tumbled Rose offers detailed engraved flowers in many sizes, including small and large.
FAQ
What material would your recommendation be to learn woodworking?
Start off with softwood like pine and poplar. Once you feel comfortable with these two, move on to hardwood.
How much money will I need to get started?
Because every project is unique, there aren't exact numbers. These factors will help you get an estimate of how much money is needed.
-
Material cost
-
Tools and equipment
-
The time spent on the project
-
Hourly rate
-
How much profit do you expect to earn
-
Hire help
For those just beginning, it may be a good idea to start small with simple items like boxes and picture frames. You will gain more experience and be able to tackle larger projects.
How often should new supplies be purchased?
Over time, you may need to replace your tools. If you're using hand tools, you'll need to sharpen them regularly. And if you're using power tools, you'll need replacement parts periodically. To avoid buying too much at once, try to spread your purchases out over a few months.
Is there a way to start my own woodworking company?
It can be difficult to start your woodworking business. There are many requirements and regulations that must be followed. You don't have to go through all that hassle of setting it up. Many people join already-established businesses. This will allow you to avoid paying membership fees and taxes.
Statistics
- In 2014, there were just over 237,000 jobs for all woodworkers, with other wood product manufacturing employing 23 percent; wood kitchen cabinets and countertop manufacturing employing 21 percent. (theartcareerproject.com)
- Overall employment of woodworkers is projected to grow 8 percent from 2020 to 2030, about as fast as the average for all occupations. (bls.gov)
- The best-paid 10 percent make $76,000, while the lowest-paid 10 percent make $34,000. (zippia.com)
- If your lumber isn't as dry as you would like when you purchase it (over 22% in Glen Huey's opinion…probably over 10-15% in my opinion), then it's a good idea to let it acclimate to your workshop for a couple of weeks. (woodandshop.com)
External Links
How To
How to make wooden joints
This tutorial will demonstrate how to join two pieces together of wood. The "pocket hole joint" is a method whereby we drill holes into the wood and glue them together. This method works great if your wood is straight and smooth. You might consider dowel joinery if your wood isn’t straight or flat. These are the steps
-
Drill Pocket Hole Joints. First, measure the area where you wish to place the pocket joint. Use a jigsaw or handheld drilling machine to drill 3/8 inch deep holes at the ends of each wood piece.
-
Sand Smooth. Sanding the wood's edges will help ensure that the joint won't split later.
-
Glue together. Apply glue to both sides of the wood. Let the wood sit for 5 minutes, then clamp it together.
-
Secure the pieces together. After the glue has dried thoroughly, secure the pieces so that they are flush.
-
Trim Joinery. Trim the excess wood around the joint after the glue has dried completely.
Allow enough space between pieces so you can turn them inside out.