
A lidded project is one that requires you to measure the box's sides and perimeter. The lid and the box are usually made from the same 2-in thick seasoned wooden block. You will need to cut a foot across one end of the wood in order to square the base. Because the final box will rest on the base alone, the center must be slightly recessed. You can use a small scraper or a knife to make the recess.
Hollowing end grain in lidded cabinets: challenges
End grain hollowing is a common problem when making boxes. This process is complex and requires specialist tools. By grinding an old screwdriver, you may be able create a basic hollowing instrument for around $30. Alternatively, you can buy a gouge and use it for this purpose. The key to hollowing end grains is to not use sharp edges. A gouge should feature a long, flat edge and a round fingernail.
The biggest challenge in hollowing end grains is that they are five times more difficult to hollow than side grains. It can also be susceptible to tearing. This is why many experienced bowl turners experience difficulties hollowing end-grain. This can be solved by changing from a gouge into a scraper, but it's worth noting that lidded containers often require special tools for hollowing end grain.
Methods to create a snap-fit lidded bag
A snap-fit lidded container is a container that has a sliding closure. These boxes can contain liquids or other liquid-filled items. These boxes are simple to assemble and disassemble. They can also be automated for lower assembly costs. There are many kinds of snap-fits. Engineers should evaluate each one for cost, strength and potential failure rates. Below is a list of different types of snapfits.
You should design the upper part of a 3-D printer-created snap-fit lidded box with the correct dimensions. The upper section should fit snugly with the base. The lid should not move when seated. A proper snap fit should be evident in the lid's fit. This can be achieved by removing wood in small steps. Although this may seem difficult, it is well worth the effort.
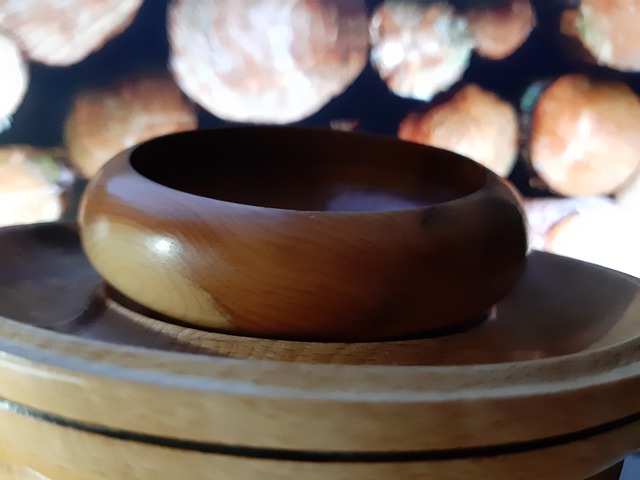
Wooden lidded containers

You can salvage wood from trees to make the different types of wood used in lidded boxes. Once the wood has been removed from a tree, it is dried to prevent cracks. Another drying process is used to shrink the wood. Depending on the style, the lidded boxes can be made of different wood types. A lid generally consists of two pieces. The smaller one is the top.
By turning small circular containers on a lathe, they could be made with lids. A turner typically used boxwood, a slow-growing tree with a close grain and thin parts. This wood was particularly useful for making fine features because the grain was so close together. This wood was often used to make double-sided, combs. Boxwood was also used to make lid boxes, also known as pyxides.
Size of lidded box
The size of a lidded box depends on the type of wood you use. Maple and cherry are both common choices. These two wood types make great boxes because they have different shrinkage rates. A box of quality should measure at least three inches square by five to six inches in length. Choose dry wood when choosing the box material. You can use exotic woods to create a lid that is attractive and appealing, but it is best to be familiar with the process.
Preparing the wood is the first step. To smoothen and round the bottom of the box, a thin chamfer will be needed. Make a V-shaped cutting at the joint. Once you are happy with the shape you can use a spindle roughing gouge to shape the rest of your box. Before carving the lid, make sure to use a parting device to mark the bottom. Then, you can use a skew-chisel or a pencil to create a small chamfer at the base of your lid. This will soften corners and hide a slight circularity around the base/lid joint.
FAQ
What wood items do well?
The most successful wooden items are made from sustainable wood.
Oak, cherry and mahogany are the most sought-after wood types for furniture.
These woods are very strong, but they also have beautiful grain patterns and colors. They are also very durable if properly maintained.
To prevent moisture damage to wood furniture, it is important that it be painted before any other surfaces. This applies to all surfaces including drawers, doors, handles, and handles.
Paint that is water-resistant will ensure furniture lasts for a long time.
Use a high-quality, oil-based primer and two coats of topcoat. Depending on the amount of wear, you may need several coats.
Avoid spray cans or aerosol colors. These products contain solvents which evaporate quickly and leave behind harmful fumes.
Where can I locate free woodworking plans
You don't need to purchase any books or magazines to find free woodworking plans. You only need to Google search. Simply type "free woodworking” into the search box and you'll find hundreds of websites that offer free plans.
Is it difficult to start my woodworking business?
It's not easy to start your own woodworking business. There are lots of legal requirements and regulations that you'll need to follow. However, it doesn't necessarily mean you must go through all the hassle of setting up a business. Many people prefer to join existing companies. This allows you to join existing businesses and pay only membership fees.
Statistics
- If your lumber isn't as dry as you would like when you purchase it (over 22% in Glen Huey's opinion…probably over 10-15% in my opinion), then it's a good idea to let it acclimate to your workshop for a couple of weeks. (woodandshop.com)
- Average lumber prices rose about 600 percent between April 2020 and May 2021. (familyhandyman.com)
- In 2014, there were just over 237,000 jobs for all woodworkers, with other wood product manufacturing employing 23 percent; wood kitchen cabinets and countertop manufacturing employing 21 percent. (theartcareerproject.com)
- Woodworkers on the lower end of that spectrum, the bottom 10% to be exact, make roughly $24,000 a year, while the top 10% makes $108,000. (zippia.com)
External Links
How To
How to drive a nails in wood
First, choose the right size and type of tool to drive a nail through wood. Claw hammers include mallets, claw hammers (sledgehammers), mallets, ball-peen hammers, hatchets, and mallets. Each kind of hammer has its own advantages and disadvantages. A claw hammer, for example, is the best choice if you need to hit nails hard. However, it's not easy to know exactly where the impact will land. The sledgehammer works well for large areas, but is too heavy for smaller tasks.
Once you have chosen the right hammer for you, put your hand flat against its side so that it rests comfortably in the palm of your hand. Grip the handle firmly, but don't squeeze it so tightly that you hurt yourself. The hammer should be held straight up with your wrist relaxed. Next, swing the hammer toward the ground and aim for the nail's center. You should feel the impact from the hammer striking a nail. If you're having trouble getting the hang of swinging a hammer, practice with a block of wood until you get the rhythm down.
Once you are ready to drive the nail, place the hammer close to your body. Place the nail so that it is perpendicular with the wood's surface. Keep your attention on the tip. Swing your hammer forward. Then follow through with the motions of the hammerhead. Repeat this action several times, gradually increasing the speed of the swing. Try adding power to your swings when you've mastered the technique. Hold the hammer high above your shoulders and pull it down. This will allow you to exert more energy.
Once you've nailed the first hole, remove the hammer from the nail. Use a pry bar or screwdriver to pull out the rest of the nails. Keep the nail heads parallel to the board's surfaces in order to avoid splitting wood.