For beginners who want to begin a scrollsaw project, the most difficult ones are those with many steps. You will need to have some knowledge of scroll saw patterns and woodworking. You can then move on to more challenging projects once you've mastered these basics. You could make a panel using a rectangular container's lid. Then paint it to make it look more like a painting.
Wood
If you're into woodworking, you may be looking for Scroll Saw patterns. These patterns are created by professional woodworkers and are available in a variety of sizes and materials. These patterns are also available in print-outs as well as downloads. Scroll saw patterns can be a great way for beginners to learn about this popular craft. Start by buying Wooden Scroll Saw Patterns to get you started.
To protect the surface of your wood when you're removing the template from your wood, you can use clear masking tape or contact paper. These materials prevent your wood from becoming splintery or dingy. This tape prevents the tape from fading if your plan is to stain the pattern. The glue within the tape will lubricate blades while you are cutting. Protective coverings for your wood can be made from contact paper, shelf liner or even newspaper.
Polywood
There are many ways to attach woodworking patterns to wooden surfaces. Spray adhesive is one of the most popular methods. It comes in a container and can be found in the glue section at your local supply store. There are two types: permanent bond and temporary bond. Which type you choose depends on how intricate your cutting is, as well as the amount of tape that you wish to use under the pattern. Below are some tips on how to apply blue tape wood. Also, keep your saw blade cool when cutting.

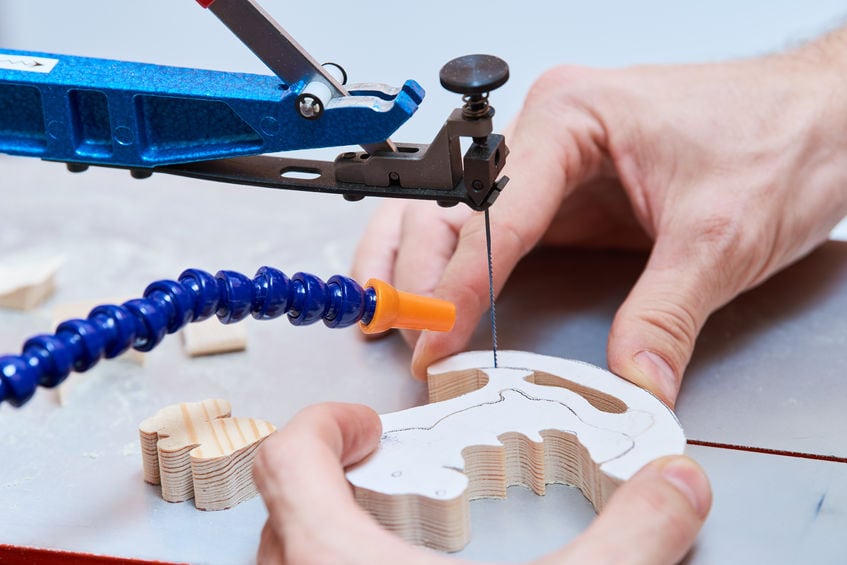
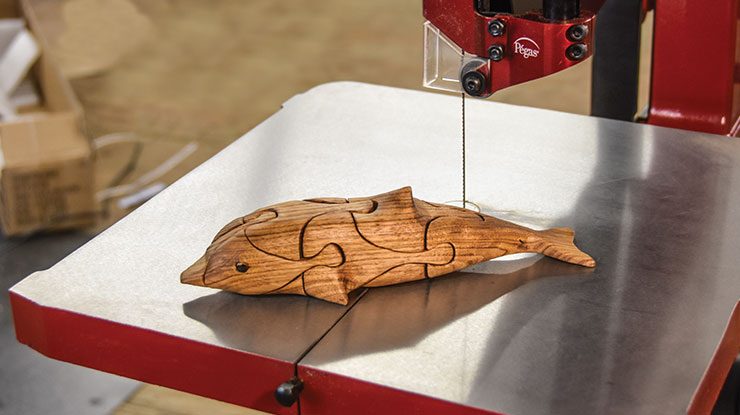
Regardless of the type of wood you plan to use for your project, scroll saws are excellent tools for complex motifs. Scroll saws can be used to cut wood with precision when used properly. Scroll saw blades are available in a wide variety of weights, so you can choose one that suits your needs. A larger blade is necessary to be able to spin the wooden piece 360° if you plan on using wood. Because of their smooth surface, aluminum work tables are more suitable than wooden ones.
Leather
You have many options when it comes to making your own leather crafts. To get started with a scroll saw, it is advisable to choose simple shapes. Basic patterns are great for beginners as they will help them get a better grasp of the tool. The more complex patterns, however, will require you to have some experience using a scroll saw. The M1 Abrams Tank, an American military symbol, is one example of a pattern that you might like. This design features a 16 inch long barrel and is easy for anyone to follow. The pattern is great for classrooms as well and the kitchen as it will nourish both the mind AND the soul.
Inlays are the most widely used type of patterns. They require a fast and easy method to make. While they aren't as critical as cuts on a traditional table saw, they require a steady hand. You should consider the angle of your table and the width of your blade when choosing your inlay design, as it will impact the relief and depth of the finished piece. The pattern should be sufficiently wide to cover the saw's kerf, and should be multi-leveled if it is necessary to pierce.
Fabric
You can create intricate scroll saw designs by using a variety of patterns. Many patterns are free and can be downloaded to a computer, allowing you to use them for a variety of projects. Most scroll saw patterns are suitable for beginners, although there are also some for more experienced scrollers. Scroll saw patterns are not only great for creating beautiful pieces but can also be used as decorative pieces and gifts.
These patterns make for great decor and are some of the most loved. A circular scroll saw pattern, for instance, would look great against a blank wall. It would be easier to place objects inside the oval-shaped mirror frame than in a rectangular one. Vintage cars and crosses would make a beautiful display in a Christian home. There are many patterns that can be made from wooden ornaments for those who want something more unique.
Wooden blocks
This woodworking guide contains 28 different scroll saw puzzle designs, each categorized by difficulty. These patterns come with step-by-step instructions and color photos to help you complete them. These patterns feature the talents of talented artists. The puzzles can also be used as crafts fair gifts. They also make great keepsakes. The pattern book also includes an introduction to creating your own scroll saw patterns. It is a wonderful resource for beginners and well worth the price for experienced scrollers.
A scroll saw pattern is useful for many projects, including decorative projects, storage, and even a way to learn how to use the scroll saw. Wooden blocks are a great way to start making things at home. Patterns that have detailed instructions are best for beginners. As they get more experience, beginners should start with the simplest patterns first.
Man made planks
Whether you're just starting out with woodworking or are looking for more advanced projects, there are many ways to find the right scroll saw patterns. Often, the best place to find scroll saw patterns is in a book. Scroll saw books can be found nearly anywhere there are book. Although they may seem difficult to find, they are easy to find. Scroll Saw Woodworking & Crafts offers patterns for featured articles. If you'd like to learn more about woodworking, check out their website.
Scroll saw patterns dating back to the late 1800s are of particular importance due to the craftsmanship and history that they represent. Some patterns date back several centuries, and experts estimate that 80 percent have been lost. Ernie Lang, a scrolling historian, has successfully recreated over one hundred fifty projects using these patterns. These patterns are from Bachman's scrolled work, which are currently on display at museums and private homes.
FAQ
What kind of wood should I use?
Oak, maple, cherry and mahogany are the most common wood types used for woodworking. Each wood type has its own characteristics which affect the final product's appearance and feel. Oak tends to be harder and darker than other woods. Birch is soft and lightweight, while mahogany is denser and heavier. You can also pick between veneers and solid wood. Veneers can be described as thin sheets of wood that have been glued together in one layer.
How much do hobbyists need to invest in starting a business?
A lot of capital is required to purchase the necessary supplies and tools if you want to start your own woodworking shop. You can start by purchasing a small table saw and drill press as well as a circular saw, circular saw, jigsaw and sanding machines. These items won't break the budget and aren't expensive.
How do I determine what kind of wood my project is made from?
Always verify the label on wood purchases. It should have information about the wood species as well its moisture content and whether any preservatives were used.
How much should a skilled woodworker earn per hour?
The hourly rate of a professional woodworker depends on many factors including experience, skill level, availability, location, etc.
The average hourly rate for a skilled woodworker ranges from $20-$50 an hour.
An hourly rate of $10 for a less skilled woodworker could be possible.
Do you have any tips on starting a woodworking business?
It takes a lot of effort to start a woodworking business. If you are passionate about your hobby, it will not be difficult to put in the work. You will probably love the challenge of starting your own business.
One thing to keep in mind when launching a new venture is that you might encounter unexpected problems along the way. You might run out unexpectedly of funds. Or you might find that your customers aren’t willing or able to pay as much you had hoped. To survive, you'll need to be prepared for such situations.
One tip is to have a separate banking account for your company. You'll be able to track how much money comes in and out.
Statistics
- In 2014, there were just over 237,000 jobs for all woodworkers, with other wood product manufacturing employing 23 percent; wood kitchen cabinets and countertop manufacturing employing 21 percent. (theartcareerproject.com)
- The U.S. Bureau of Labor Statistics (BLS) estimates that the number of jobs for woodworkers will decline by 4% between 2019 and 2029. (indeed.com)
- Woodworkers on the lower end of that spectrum, the bottom 10% to be exact, make roughly $24,000 a year, while the top 10% makes $108,000. (zippia.com)
- The best-paid 10 percent make $76,000, while the lowest-paid 10 percent make $34,000. (zippia.com)
External Links
How To
Here are some tips on how to drive nails in wood
To drive a nail into wood, the first step is to select the right size and type hammer. Claw hammers include mallets, claw hammers (sledgehammers), mallets, ball-peen hammers, hatchets, and mallets. Each kind of hammer has its own advantages and disadvantages. For example, a claw hammer works best when you want to hit something hard, like nails; however, it's difficult to control precisely where the blow lands. A sledgehammer allows you to hit large areas simultaneously, but it is too heavy and cumbersome to use for small tasks.
After choosing the right hammer, place your hand flat against the side of the head so that the handle rests comfortably in your palm. You can grip the handle with your fingers, but not so tight that it causes injury. The hammer should be held straight up with your wrist relaxed. You should then swing the hammer straight up, keeping your wrist relaxed. You should feel the impact of the hammer striking the nail. You can practice swinging the hammer with a block or wood until you feel the rhythm.
Hold the hammer near your body until you're ready for the nail to be driven. To ensure that the nail is perpendicular on the surface of the wooden floor, position it. Keep your eyes focused directly on the tip of the nail. Swing the hammer forward, and then move the hammerhead. Repeat this action several times, gradually increasing the speed of the swing. After mastering the technique, you can add power to your swings. To make it more powerful, hold the hammer up high to your shoulder and then bring it down. This will allow you to exert more energy.
Once you have made the first hole, remove your hammer. You can then remove the rest of the nails using a prybar or a screwdriver. To prevent splitting the wood, ensure you keep the nail heads flush against the board's surface.