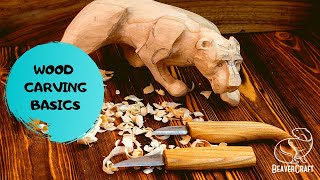
If you're a beginner and want to try your hand at whittling, you can start with the basics. You will need a knife and wood. In this article, you'll learn about tools, techniques, and wood types. Once you understand the basics of whittling, you are ready to begin your own project. There are many whittler project options.
Wood
There are thousands of different types of wood. However, these four woods will be most effective for whittling. These woods will help you learn the basics of whittling if you're just beginning. There are many methods to whittle wooden pieces to make different shapes. These are just a few of the basic methods you can use to whittle wood.
The pull stroke: When carving wood, it is important to keep your blade parallel to the grain. This will ensure that the wood is not ripped. You can tell which direction the grain is by looking for dark streaks throughout the wood. When whittling hardwood, the direction of these streaks will dictate the direction the blade should be pointing. The pull stroke is not as effective as the push stroke.
Knife
You can learn the basics of woodworking by whittling with your knife. Although you may not be an expert at this task, you will have greater control over your knife and can make more precise cuts. By cutting small strips of soap using a knife, you can practice pulling strokes. Practice makes perfect. Beginer projects are easy to manage, but they get more difficult as you advance.
A knife is necessary before you begin whittling. A pocket knife is ideal, as it is sharp enough to produce shavings with a sharp blade. Avoid knives that have long, sharp blades. They can cause choking and should not be used for this purpose. Choose a knife that has a narrow bevel to make it easier to sharpen. A frame saw can be used if needed.
Techniques
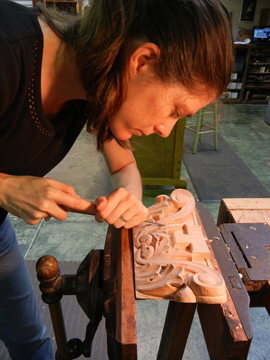
These techniques can help you improve your skills in whittling. The pull stroke is most common. This involves placing your right thumb onto the wood and pinching both your right and left fingers. Now, hold the knife straight while drawing the blade towards your thumb. This stroke is short and controlled, and it gives you a lot of control over the blade. This is an excellent technique for making precise cuts.
There are two main types of whittling book. The Old Time Whittling book is the best reference book for complete beginners. The Little Book of Whittling also has many great ideas for whittling. There are many whittling projects in the Whittling Handbook. The Art of Whittling also contains advanced projects. This book includes simple puzzles and patterns like ball and cage.
Tools
To make whittling tools, the first step is to find suitable wood for your projects. Although you can use any wood that is already in your possession, it is best to collect greenwood. It is much easier to carve greenwood than dry wood. You can also collect deadfall branches at any time of year. You can collect small trees at any time, but it's best to cut them in winter. Before you collect wood from private property, make sure to ask permission.
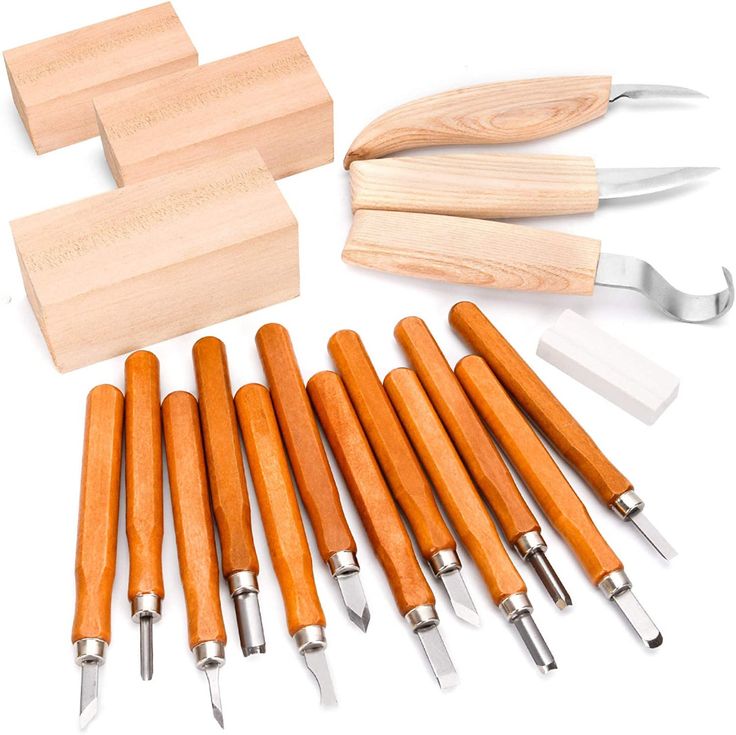
There are many sets that can help you get started. The Delicacy Carving Set includes 12 tools as well as a blank for a wooden spoon and a knife-sharpener. The set comes with protective gloves as well as a case. A set of whittling instruments is worth the investment, as you will be using them for many years. This set is also a great way to get started.
Beginner projects
If you are new to the art of wood whittling, you might want to start with a simple project, like a walking stick. You can progress to more complicated projects like carving faces on walking stick. Comfort Birdie, a bird for beginner whittlers, may offer some comfort. A swan is another beginner-friendly whittling project. These make great gifts for children, and they are simple to make even for beginners.
A carved balls in a box is another project that is considered a beginner's project. It is possible to create intricate designs using feathers and match them with your theme. Tiki idols can also be created. While there are many ways to create Tiki idols and woodland spirits, it's always good to have a template in place before you begin. This will help you to know which pieces and tools are appropriate.
FAQ
What kind and type of wood should i use?
Oak, maple, cherry and mahogany are the most common wood types used for woodworking. Each wood variety has distinct characteristics that influence the final product's look and feel. Oak, for instance, is darker and harder than most other woods. Birch is lightweight and soft while mahogany is heavier and denser. There are two options: solid wood and veneers. Veneers can be described as thin sheets of wood that have been glued together in one layer.
Where can I find free woodworking plans?
Free woodworking plans are available online. You don't even need to buy books or magazines. You just need to search Google. Enter "free woodworking", and you will see hundreds upon hundreds of websites offering free plans.
What is the difference of plywood and particleboard?
Plywood is made of layers of wood that are pressed together under pressure. Plywood is available in a variety of thicknesses. It is often used to make cabinets or flooring. Particle board consists of sawdust mixed and resin. The resin is then compressed into large blocks. It's often used for home renovation projects. Both boards can be cut easily and are both durable.
What is the hourly rate for a woodworker?
The hourly rate for a professional woodworker varies depending on many factors, including skill level, experience, availability, location, and other variables.
An hourly wage for skilled woodworkers is between $20 and $50.
An hourly rate of $10 for a less skilled woodworker could be possible.
Where can you buy hardwood lumber?
You can buy hardwood lumber at Home Depot. You can find all types of wood products at Home Depot, such as flooring, cabinets and furniture.
A large variety of engineered hardwoods is available to them, including Ipe (Araucaria Angustifolia), Brazilian Cherry and Peau d'Arco.
You can find these woods for sale online by searching "hardwood lumber" on Google.
Statistics
- The best-paid 10 percent make $76,000, while the lowest-paid 10 percent make $34,000. (zippia.com)
- If your lumber isn't as dry as you would like when you purchase it (over 22% in Glen Huey's opinion…probably over 10-15% in my opinion), then it's a good idea to let it acclimate to your workshop for a couple of weeks. (woodandshop.com)
- Overall employment of woodworkers is projected to grow 8 percent from 2020 to 2030, about as fast as the average for all occupations. (bls.gov)
- Average lumber prices rose about 600 percent between April 2020 and May 2021. (familyhandyman.com)
External Links
How To
How to make wood joints
This tutorial will show how to join 2 pieces of wood together. We'll use the "pocket hole joint," which means we drill holes in the wood and then glue them together. If your wood is straight and flat, this method will work well. Try dowel joinery instead if your wood doesn't look straight. These are the steps
-
Drill Pocket Hole Joints. To start, measure and mark where you want to put the pocket hole joint. With a handheld drill machine or jig saw, drill 3/4-inch deep holes in the ends of each piece.
-
Sand Smooth. The wood's edges can be sanded to prevent splitting.
-
Glue Together. Apply glue to the sides of both wood. Allow it to cool for at least 5 minutes before you attach the pieces.
-
Fix the Pieces together. After the glue has dried properly, clamp the pieces together to make sure they are flush.
-
Trim Joinery. Trim the excess wood around the joint after the glue has dried completely.
You should leave enough space between the pieces to allow you to turn them inside-out.