Chip carving can be difficult if you've ever tried it. There are many techniques and styles that you could try. But which one should you choose? What tools are necessary? I will be sharing my tips and tricks for carving chips. There are many key ingredients to successful chip carving, no matter how traditional your style.
Traditional
Chip carving is one form of decorative woodcarving that dates back to the beginning. This requires a straight-edged or offset knife. Chip carving is the process of making small triangular incisions on wood to create a pattern. This art form originated over 1,000 years ago. It was so popular that many designs looked the same across nations, making it difficult to tell which one was which.
As wood carving spread across the globe, generations passed down the skills. In Sweden, chip carving was a common way to decorate furniture and eventually schools were established to teach the art. Modern chip carvers benefit from centuries of experience and the skills of carvers. Through the generations, knowledge was passed from carver to apprentice to student. It's a continuous process that continues into the present.
Free form
If you've always wanted to try chip carving, you've come to the right place. A DVD by Murray Taylor shows you how to create freeform and geometric carvings. It's an excellent introduction project that contains lots of information. Both NTSC and English versions are available. The DVD is also available in widescreen and stereo. Artisan Media Ltd. holds the DVD. It can also be downloaded in MP4 format to Windows and Mac computers.

Triangles, lines, and circles are the most common shapes used in geometric chip carving. The technique allows for unlimited shapes and patterns and can be used to combine different styles. This type of chip carving is also known as free-form chip carving. You can make your chips look beautiful in any room, no matter whether they are a flower, a dragon or a tree. Free form chip carving can be an effective way to incorporate many different techniques into one piece.
Techniques
Chip carving has been practiced for hundreds of years. Examples can be found in countless countries throughout the world. You can find chip carving on boats paddles and other ceremonial tools handles in the South Pacific Islands. The carvings were likely made using pieces of bone and seashells, although some people also used shark teeth. This book will show you how to create amazing designs by using different chip carving techniques.
If you're familiar with a few basic techniques, chip carving is very simple. The first of these is to know how to carve the fine triangle. This pattern is simple to follow and understand. To carve this pattern, you simply need to carve various triangles and repeat this process over again. However, this does not mean that your chip carving has to be boring - by varying the triangles, you can create a range of wonderful patterns.
Tools
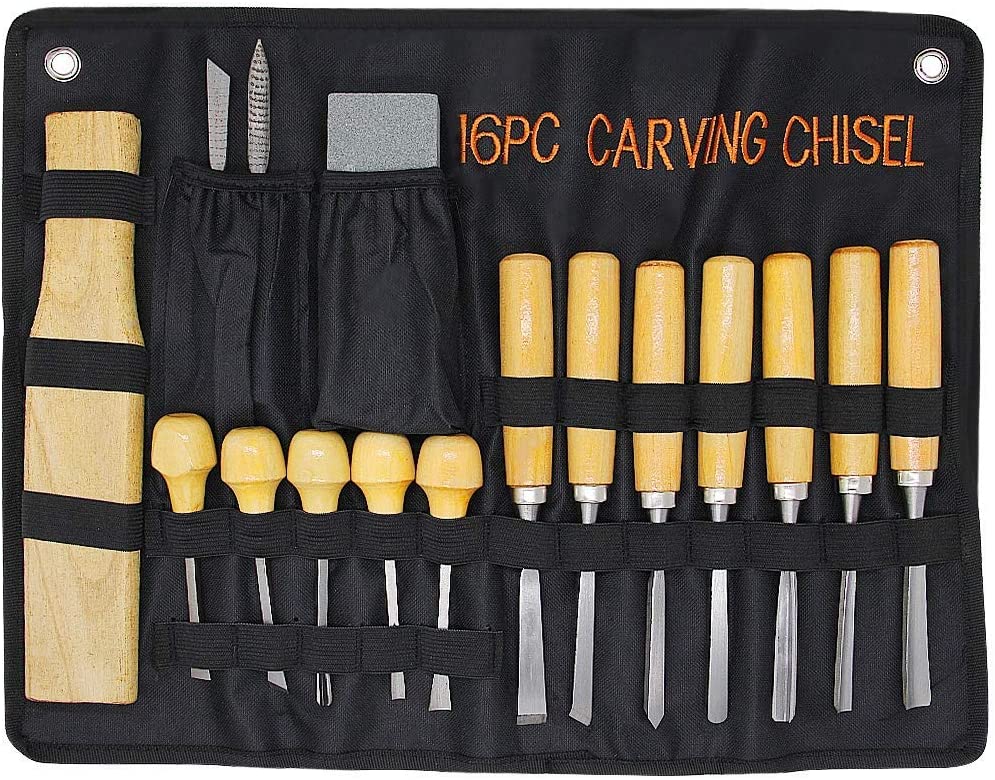
Lora S. Irish will provide a free online seminar on chip carving. She teaches you how to use various carving tools and supplies, including a chip knife, stab knife, and detail bench knife. Irish will also be demonstrating the different types and uses of wood carving tools. You can choose from the list below to purchase the right tool for your carving needs. These tools can be used to create simple designs and shapes, or more complex designs.
Special geometry is required for chip carving knives. It is approximately 1 1/2 inches long with a narrow back edge. This makes it possible to make precise incisions. Also, it is important to pick a sharp point for the needle so that the edges meet perfectly. Also made of stainless steel, chip carving knives come with a sharp point. A chip-carving knife should be sharp enough for cutting a small piece of wood.
Getting started
When getting started with chip carving, you must first learn about its methodology. The type of carving you want to do will affect the process. However, these principles will help you ensure your work is accurate. The chip carving method involves making a pattern in the wood. Follow these steps for your first chip carving:
It is very important to sharpen a chip carving knife. You will notice that the blade of the chip carve knife has bevels on both sides. This is an indication that it's a primary chip carve knife. The sharpening tool is shaped like a small diamond and can produce sharp edges. Place the stone at a 10 degree angle. It will also sharpen your chip carving knife as well as your chip carving tool simultaneously.
FAQ
What kinds of woods are good for making furniture?
Woods are classified according their hardness. Softwoods include cedar, pine, cedar, and Cypress. Because they are resistant, they can be used for outdoor furniture. The hardwoods are oak, maple and mahogany. Because they are not weather-resistant, they are best used indoors.
Can I refinish my own furniture?
Yes! Yes! There are many methods to refinish antique furniture without hiring a professional. Here are some examples:
To remove stains and scratches, use sandpaper. Use a clean cloth to wipe the surface.
Apply clear polyurethane finish. Allow to dry completely before moving furniture.
Acrylic paint is a great way to paint furniture.
Instead of painting, use stain. The furniture will have a rich look thanks to the stain.
Shellac wax is applied. Applying wax will give the wood shine and protection.
Which wooden items are very popular?
These wooden products are the most popular. They were made from sustainably harvested wood.
Maple, cherry, mahogany walnut, teak, mahogany and maple are the most common woods for furniture.
These woods are extremely strong but also have beautiful colors and grain patterns. They are also very durable if properly maintained.
To prevent moisture damage, wood furniture should always first be painted. This applies to all surfaces, even drawers and doors.
Paint that is water-resistant will ensure furniture lasts for a long time.
You should use a high-quality oil-based primer followed by two coats of top coat. Depending on the amount of wear, you may need several coats.
You should avoid using aerosol paints or spray cans. These products are contaminated with solvents, which evaporate rapidly and can leave behind toxic fumes.
How do you calculate woodworking costs?
It is crucial to keep project costs as low-cost as possible. It is important to ensure that you are getting the best materials prices. Also, consider all other factors that can affect the price of your projects such as skill level, experience, time and cost. Check out our guide on the average cost of common DIY projects to get an idea of how much you can spend on woodwork projects.
Statistics
- The best-paid 10 percent make $76,000, while the lowest-paid 10 percent make $34,000. (zippia.com)
- The U.S. Bureau of Labor Statistics (BLS) estimates that the number of jobs for woodworkers will decline by 4% between 2019 and 2029. (indeed.com)
- In 2014, there were just over 237,000 jobs for all woodworkers, with other wood product manufacturing employing 23 percent; wood kitchen cabinets and countertop manufacturing employing 21 percent. (theartcareerproject.com)
- Overall employment of woodworkers is projected to grow 8 percent from 2020 to 2030, about as fast as the average for all occupations. (bls.gov)
External Links
How To
How to join wood without using nails
Woodworking is a hobby that many people enjoy doing. It's fun and relaxing because you can use your hands to make something useful from wood. Sometimes you may want to join two pieces together of wood without using nails. This article will help you to maintain the beauty of your woodwork projects.
Before joining the pieces of wood together, you will need to first trim any edges. Do not leave any sharp corners as they could cause problems down in the future. Now it's time to start glueing your boards together.
If you are working on hardwood, you should only use glue on one side. For softwoods like cedar and pine, glue should be applied to both sides. Press the boards down until the glue is fully incorporated. Before you proceed to the next step, be sure to let the glue dry completely.
After you glue your boards together, drill holes at the joints where screws will be inserted. These holes will differ depending on the type and size of screw you are using. For example, if your screw is a 1/2-inch wooden screw, drill a hole that is at minimum 3/4 inches deep.
Once you have drilled the holes, the next step is to drive your screws through the joint into the board's backside. Avoid hitting the board's top surface. Otherwise, you could ruin the finish. When driving the screws, try to avoid hitting the ends of the screws too much. This will prevent the wood from splitting.
After your project is completed, you will need to protect it from the weather. To do this, you can seal the entire furniture piece or just cover the top. You will want to choose a product that will be durable for many years. Oil-based varnishes are, among others, polyurethanes shellac, laquer, and other oil-based products.
These products are available at most home improvement stores. Make sure you get the right product for your job. Also, remember that some finishes are toxic and should never be used indoors. Protective gear should always be worn when handling these finishes.