
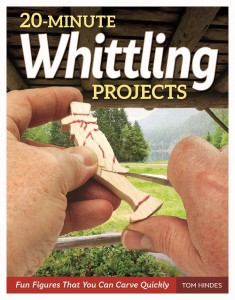
This is a very interesting ball in a box carving. This simple piece requires only one block of carving material. These two objects actually are intertwined. In this article, we'll discuss the techniques and materials used in this carving, as well as some of the differences between early and later carvings. Continue reading to find out more about the various types of cage-carvings using balls.
Techniques
To carve a metal ball in a cage you need to first cut the block. It should be three inches in diameter. Next, mark the block with pencils about one-half an inch apart at both ends. Continue to cut the block so that it slides smoothly along the rails. To round the block make small cuts on either side. You can remove any excess wood with a handsaw.
After you have cut the cube out, make a template of the shape you want. Trace the squares onto the cube using a paper straightedge. Connect the corners of each square using connecting lines. To measure the distance between the template and the cutout, you can also use a depth gage. This distance will determine the depth and size of the inner-cage. The finished piece should measure approximately two-thirds of the original cube's height.
Materials
Ball in the cage carvings make for a very unique project. This piece of woodcarving may seem complicated at first but it is actually very easy to do. Each object is carved from a single block of carving material. The cage and ball are intertwined using the same technique. You'll quickly find the carving process easy and fun.
You will need a block of wood that is the right size and length to carve your ball into a cage. You will need a block measuring 3 1/2" by 3 1/2". Next, trace the block's length using a pencil. Make sure to leave a gap of about half an inch at each end. Make sure to remove pencil marks when cutting the block. You can then create the desired shape by carving individual bars.
Comparisons

If you're a beginner woodcarver, this project is for you. Not only is this project an excellent way to practice your new skills, but it is also a great gift idea for Valentine's Day or a birthday. You can use a ball in a cage to carve a cup. Here are a few examples of carvings of a ball in a cage that you can give as a gift.
Carvings from the early and late periods
The ball in a cage was an iconic Civil War object. It was part of a larger Civil War collection. Made of a single piece of wood, the ball in a cage measures approximately 4 1/2 inches in diameter. It may have been whittled by a soldier to pass the time. These were quite popular in the 1840s. However, the practice has declined over time. We'll be discussing some early and late ball in a box carvings.
Rarely are there balls with intricate carvings. They usually range in size from 2+3/4 inches across, with between three and 160 knobs. Some are entirely bare, with no ornamentation, while others are highly decorated with engraved patterns. Some ball in a box carvings have knobs that can be adorned with multiple designs. One knob can be in the shape a lion.
Sources
Jespersen explains how he makes his wood carvings, and how readers can make their own prototypes in his book "Carving a Ball in a Cage." He also details the tools required for this type. He describes, for example, how to prepare a wood blank and draw lines that will guide his carving. He describes the steps involved in carving cubotetrahedrons (or dodecahedrons) and cubes.
FAQ
What kind of tools do carpenters use?
Carpenters most often use a tool called a hammer. A hammer is useful for driving nails into wood. It also helps them hold pieces together while they are working on a project. Other tools include clamps.
How do I get started with woodworking?
Building furniture is the best way to learn how furniture is made. You'll need tools, and you'll have to make mistakes along the way, but if you keep at it, you'll eventually figure out what you're doing.
Begin by choosing the project that you want to finish. It could be something as simple as a box or as elaborate as a full-scale entertainment center. Once you've settled on a project find a local skilled woodworker. Ask him or her for advice on what tools you'll need and where to find them. It's possible to ask your friend if they do this type of work.
How can I keep my shop organised?
Setting aside an area to store tools is the first step in keeping your workshop organized. You want your tools to stay clean and free from debris and dust. You can hang tools and accessories with pegboard hooks.
What kind wood should I use for my project?
There are many wood types that are used in woodworking, including oak, maple and birch. Every type of wood is different and can have a unique look and feel that will affect the final product. Oak is a darker wood and tends to be more durable than other types. Birch, which is lighter and soft, is more heavy than mahogany. You can also choose between solid wood and veneers. Veneers consist of thin sheets made from wood and glued together to form a single layer.
How can you calculate the woodworking price?
Remember to keep costs as low as you can when calculating project costs. It is important to ensure that you are getting the best materials prices. Also, consider all other factors that can affect the price of your projects such as skill level, experience, time and cost. Check out our guide on the average cost of common DIY projects to get an idea of how much you can spend on woodwork projects.
Statistics
- Average lumber prices rose about 600 percent between April 2020 and May 2021. (familyhandyman.com)
- The U.S. Bureau of Labor Statistics (BLS) estimates that the number of jobs for woodworkers will decline by 4% between 2019 and 2029. (indeed.com)
- Overall employment of woodworkers is projected to grow 8 percent from 2020 to 2030, about as fast as the average for all occupations. (bls.gov)
- Woodworkers on the lower end of that spectrum, the bottom 10% to be exact, make roughly $24,000 a year, while the top 10% makes $108,000. (zippia.com)
External Links
How To
Tips on how to drive a nail in wood
To drive a nail into wood, the first step is to select the right size and type hammer. There are many types of hammers that you will find: claw hammers and sledgehammers; mallets; ball peen hammers; and hatchets. Each type of tool has its advantages and drawbacks. For example, a claw hammer works best when you want to hit something hard, like nails; however, it's difficult to control precisely where the blow lands. A sledgehammer is useful for striking large areas at once but too heavy to be effective for smaller tasks.
Place your hand flat on the side of your chosen hammer so that the handle rests in your palm. You can grip the handle with your fingers, but not so tight that it causes injury. Hold the hammer straight up, keeping your wrist relaxed. Swing the hammer back towards the ground, with your aim at the middle of the nail. You should feel the impact of your hammer hitting the nail. Practice swinging your hammer on a block of wooden until you feel comfortable.
When you're ready to start driving the nail, hold the hammer in front of you close to your body. You will need to position the nail so it is parallel to the wood. Keep your eyes on the tip. Swing the hammer forward, and then move the hammerhead. Continue this motion several times, slowly increasing the speed of each swing. Once you have mastered this technique, increase the power of your swings. You can hold the hammer over your shoulder and forcefully bring it down. This will help you put more energy behind each of your moves.
After you have nailed the hole, take the hammer off the nail. The rest of the nails can be pulled out using a screwdriver, pry bar, or a hammer. To prevent splitting the wood, ensure you keep the nail heads flush against the board's surface.